Spring Boot 整合 MyBatis Annotation 注解配置案例实践
🔥🔥 点击领取 ChatGPT Plus 正版账号
距离第一篇 Spring Boot 系列的博文 3 个月了。《Springboot 整合 Mybatis 的完整 Web 案例》第一篇出来是 XML 配置 SQL 的形式。虽然 XML 形式是我比较推荐的,但是注解形式也是方便的。尤其一些小系统,快速的 CRUD 轻量级的系统。
一、运行 springboot-mybatis-annotation 工程
由于这篇文章和 《Springboot 整合 Mybatis 的完整 Web 案例》 类似,所以运行这块环境配置大家参考另外一篇文章。
然后Application 应用启动类的 main 函数,然后在浏览器访问:
http://localhost:8080/api/city?cityName=温岭市
可以看到返回的 JSON 结果:
{
    "id": 1,
    "provinceId": 1,
    "cityName": "温岭市",
    "description": "我的家在温岭。"
}
三、springboot-mybatis-annotation 工程配置详解
1.pom 添加 Mybatis 依赖
<?xml version="1.0" encoding="UTF-8"?>
<project xmlns="http://maven.apache.org/POM/4.0.0" xmlns:xsi="http://www.w3.org/2001/XMLSchema-instance"
    xsi:schemaLocation="http://maven.apache.org/POM/4.0.0 http://maven.apache.org/xsd/maven-4.0.0.xsd">
    <modelVersion>4.0.0</modelVersion>

    <groupId>springboot</groupId>
    <artifactId>springboot-mybatis-annotation</artifactId>
    <version>0.0.1-SNAPSHOT</version>
    <packaging>jar</packaging>

    <name>springboot-mybatis-annotation</name>
    <description>Springboot-mybatis :: 整合Mybatis Annotation Demo</description>

    <!-- Spring Boot 启动父依赖 -->
    <parent>
        <groupId>org.springframework.boot</groupId>
        <artifactId>spring-boot-starter-parent</artifactId>
        <version>1.5.1.RELEASE</version>
    </parent>

    <properties>
        <mybatis-spring-boot>1.2.0</mybatis-spring-boot>
        <mysql-connector>5.1.39</mysql-connector>
    </properties>

    <dependencies>

        <!-- Spring Boot Web 依赖 -->
        <dependency>
            <groupId>org.springframework.boot</groupId>
            <artifactId>spring-boot-starter-web</artifactId>
        </dependency>

        <!-- Spring Boot Test 依赖 -->
        <dependency>
            <groupId>org.springframework.boot</groupId>
            <artifactId>spring-boot-starter-test</artifactId>
            <scope>test</scope>
        </dependency>

        <!-- Spring Boot Mybatis 依赖 -->
        <dependency>
            <groupId>org.mybatis.spring.boot</groupId>
            <artifactId>mybatis-spring-boot-starter</artifactId>
            <version>${mybatis-spring-boot}</version>
        </dependency>

        <!-- MySQL 连接驱动依赖 -->
        <dependency>
            <groupId>mysql</groupId>
            <artifactId>mysql-connector-java</artifactId>
            <version>${mysql-connector}</version>
        </dependency>

        <!-- Junit -->
        <dependency>
            <groupId>junit</groupId>
            <artifactId>junit</artifactId>
            <version>4.12</version>
        </dependency>
    </dependencies>

</project>
2.在 CityDao 城市数据操作层接口类添加注解 @Mapper、@Select 和 @Results
@Mapper // 标志为 Mybatis 的 Mapper
public interface CityDao {

    @Select("SELECT \* FROM city")
    @Results({
        @Result(property = "id", column = "id"),
        @Result(property = "provinceId", column = "province\_id"),
        @Result(property = "cityName", column = "city\_name"),
        @Result(property = "description", column = "description"),
    })
    City findByName(@Param("cityName") String cityName);
}
- @Mapper 标志接口为 MyBatis Mapper 接口
- @Select 是 Select 操作语句
- @Results 标志结果集,以及与库表字段的映射关系
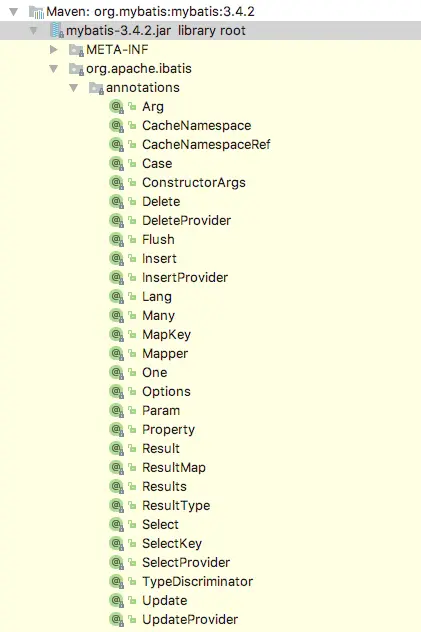
其他的注解可以看 org.apache.ibatis.annotations 包提供的,如图:
可以 git clone 下载工程 springboot-learning-example ,springboot-mybatis-annotation 工程代码注解很详细。
https://github.com/JeffLi1993/springboot-learning-example
四、小结
注解不涉及到文件配置,更近贴近零配置
🔥🔥 点击领取 ChatGPT Plus 正版账号
本作品采用 知识共享署名-非商业性使用-禁止演绎 4.0 国际许可协议 (CC BY-NC-ND 4.0) 进行许可。